In daily use, you may get used to making an extra copy of important files in case of accidental data loss. But when you want to protect the operating system, or need to modify the source data frequently, manual copy is no longer a good idea. Instead, an automatic backup strategy could greatly save your labor.
In this post, I will introduce how to set up a schedule to auto backup your important files and OS in Windows 10.
How to Auto Backup Files in Windows 10?
Windows 10 comes with File History to back up user data to external drive automatically. With it, you can easily restore a folder to a previous version when needed. Here’s how to use it:
Click Start > Settings > Update & Security > Backup, click “+ Add a drive” to select a connected external drive or network drive to turn on the service.
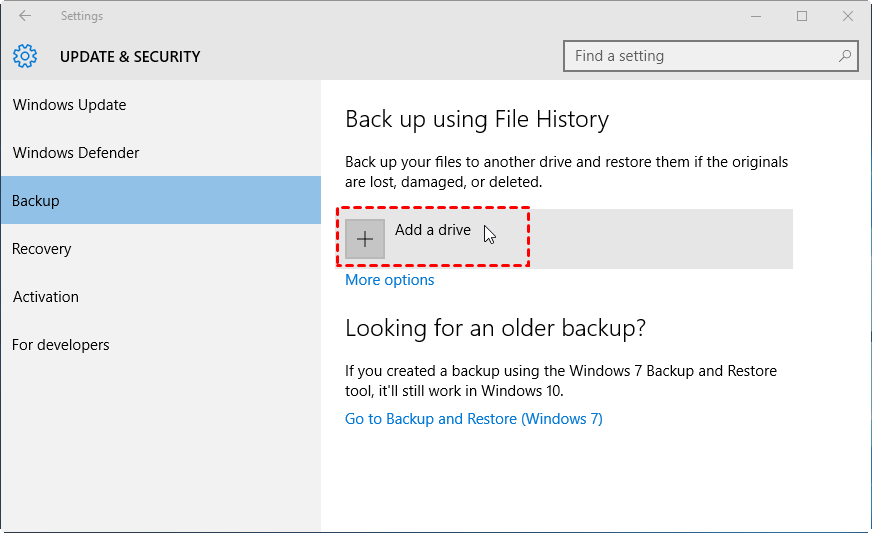
When the “Automatically back up my files” is toggled on, you can click “More options” to customize how often to backup, how long to keep the backup, or what folders you want to include or exclude. It will auto perform backups based on your settings.
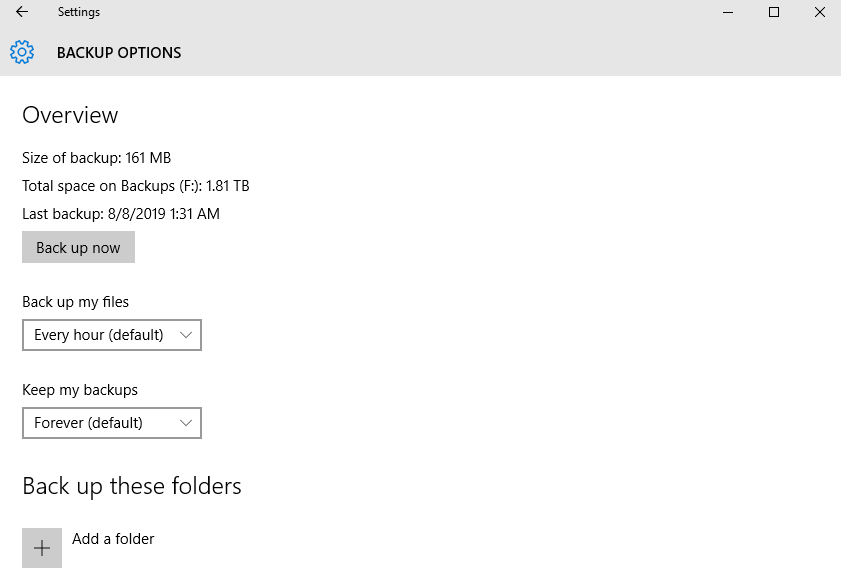
File History is a handy tool designed for file & folder backup. But as some users have reported, it may stop backing up, or miss some selected folders without notice. Therefore, if you are using it to schedule backup some particularly important files, it’s better to check the backup results from time to time.
How to Auto Backup OS in Windows 10?
In addition to data files, it’s also important to protect the operating system, because various errors might occur after major operations like Windows upgrades, app installations and setting changes. To restore your system to normal state in such cases, you need to back up the OS regularly.
As you know, Windows 10 doesn’t bring a new tool specifically for system backup, so you still need to use the Backup and Restore utility of Windows 7:
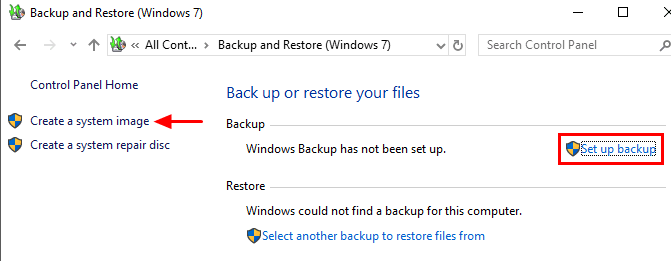
In Backup Settings, select “Go to Backup and Restore (Windows 7)” below the File History selection, then you can use this older backup utility to “Set up backup” or “Create a system image”.
Generally, you can click “Create a system image” to backup system drives, but it doesn’t include schedule options. So I will take “Set up backup” here.
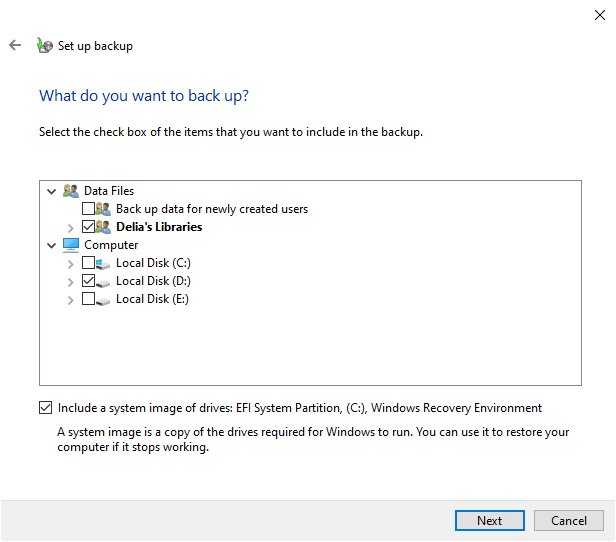
This wizard requires you to choose a destination, and select what to backup. By default, it will include system image and all the Windows folders. You can also click “Let me choose” to specify the items manually. If you only want to create a system image, then uncheck all the items and make sure the “Include a system image of drives…” option it ticked.
On the next page, you can confirm the backup settings and click “Change schedule” to automate it. In the popping out window, check “Run backup on a schedule” and choose the frequency and specific time point. Once the setup is complete, you could “Save settings and run backup”.
Easier Solution to Schedule Backup Important Files and OS
Although Windows 10 comes with backup utilities to protect your important data, they are relatively error-prone and time-consuming. To auto backup files and OS efficiently, free backup software like AOMEI Backupper Standard is a better option.
It supports all Windows OS and enables you to back up files/partitions/system/disk within several clicks. During the setup, you can easily add a schedule to run the task daily/weekly/monthly, and perform incremental or differential backup to save only changed data.
Here’s how it works:
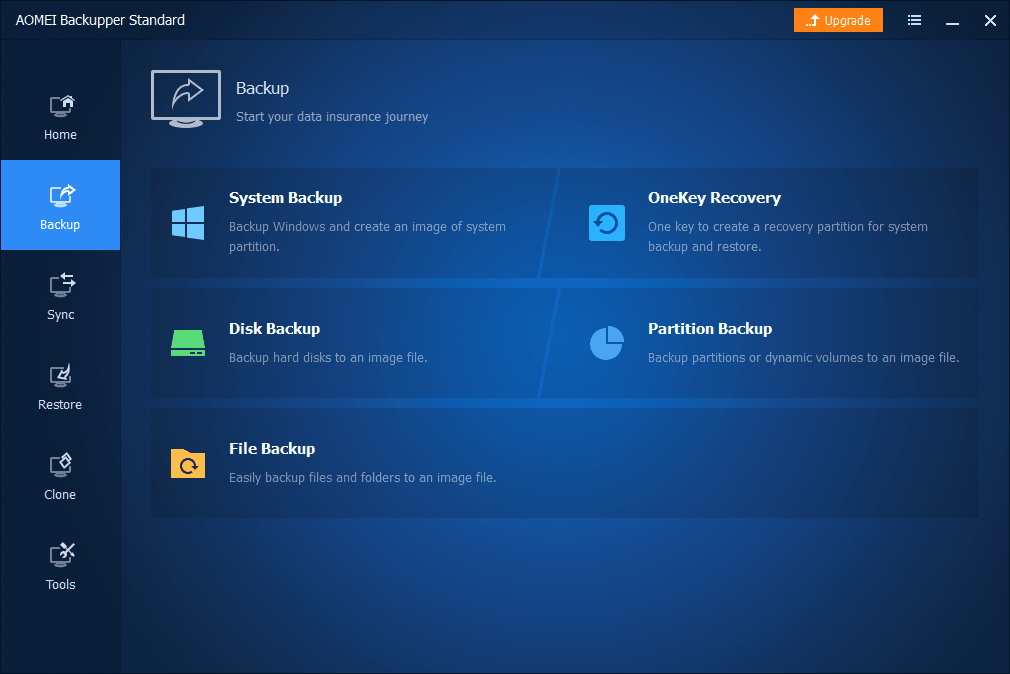
Launch the software, select “Backup” on the left sidebar. You will find different backup options for different data, like “File Backup” for individual files & folders, and “System Backup” for operating system. Select the one you need.
Follow the wizard to specify the source data and backup destination, the supported storage devices include internal/external drive, USB flash drive, NAS, network share and cloud drive.
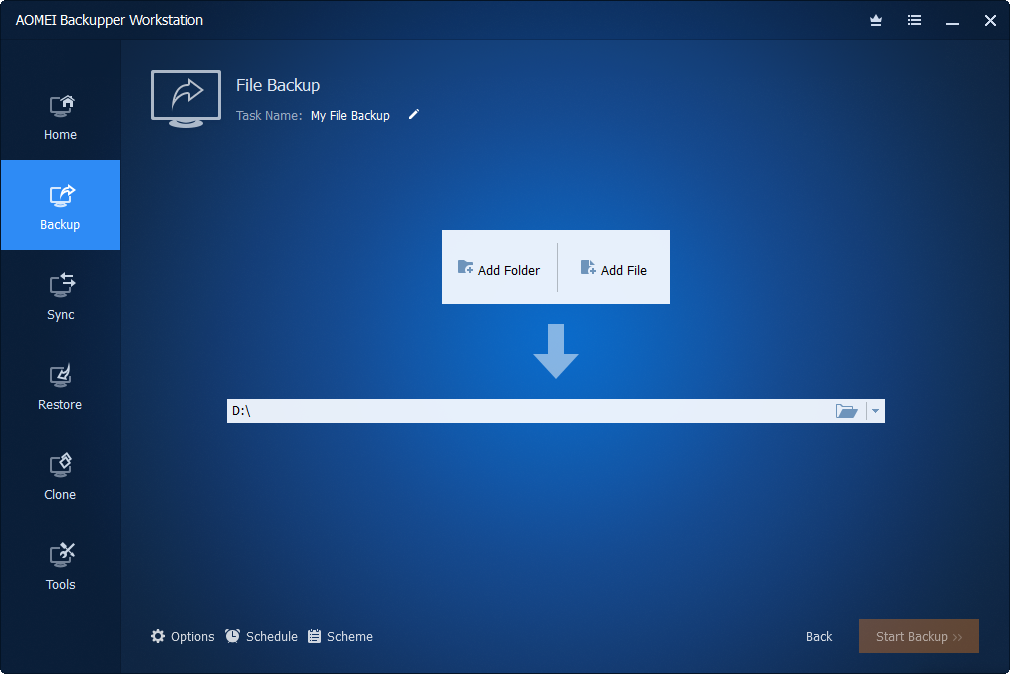
Click on “Schedule” button at the bottom to set up the automatic backup. In Standard edition, you will be given options to execute backup daily, weekly or monthly, and the scheduled backup will run in incremental mode by default.
In advanced editions, you can also run the backup when event triggers or USB plug in.

Click “Start Backup” to execute the task. When the backup is complete, you can manage the task in “Home”, or restore it in “Restore” tab.
Bottom Line
Backing up important data regularly is the best way to avoid data loss and system errors in Windows 10. To achieve this, you will need efficient backup software like AOMEI Backupper.
Compared with built-in backup tools, it is an easier solution that supports backing all kinds of data with customized schedule and auxiliary functions. Even if you need to replace hard drive, this program includes powerful clone features to help you migrate all the data and OS.


