

Why move Windows 10 to SSD?
When your computer runs slower and slower on the hard disk drive (HDD) day by day, you might have tried cleaning up your disk, uninstalling programs that are seldom used, disabling some start-up programs, deleting temporary files, etc. How those work? Have they made a significant difference? If not, you might as well transfer your Windows operating system from HDD to SSD drive.
Although hard disk drives are relatively cheap and large in capacity, their internal moving parts make them more prone to breaking down, running slower than SSD drive. Solid state drives are more durable than HDD since they don’t come with any moving parts. Besides, they can run much faster. That’s might be the main reason for which more and more users decide to migrate Windows 10 to SSD even if they are more expensive than HDD with the same size.
How to migrate Windows to SSD without re-installing?
So, how to directly migrate Windows 11, 10, 8, 7 from the current HDD to SSD without re-installing OS and other applications that are installed on the system partition? I believe most users have that doubt since no one want to re-install OS onto the SSD and tweak settings as they prefer from scratch, which may cost an entire day! That’s what brings out this post. Here we would like to show you how to realize OS migration step by step.
Preparations before OS migration
- Connect the SSD to your computer and make sure it is recognized by your computer system. If you are using a desktop, this SSD connection might be easy. Things may become tricky when you are using a laptop that has only one drive bay. In such a case, you can make use of a SATA-to-USB cable.

- Make sure there is enough unallocated space, which is larger than the source OS partition, on the SSD drive. If there is not, you need to delete or shrink an existing partition first of all. Before that, back up anything required.
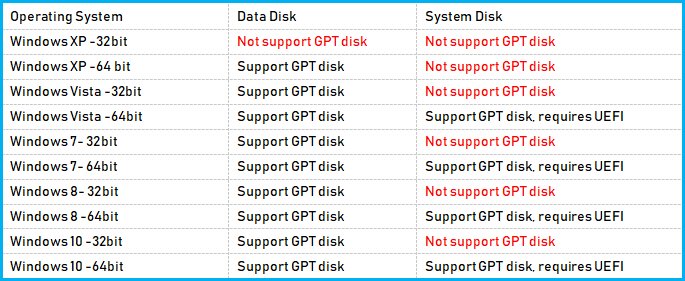
- Check out the partition table (MBR and GPT) of the source HDD and destination SSD, which decides whether your OS can boot successfully after migration. Migrating OS from MBR to GPT requires you change boot mode from Legacy to UEFI while GPT to MBR migration requires changing UEFI to Legacy. In one word, the partition table of the boot disk must be compatible with the boot mode. If necessary, you need to convert MBR to GPT, or GPT to MBR.
- Before MBR and GPT conversion, you also need to check out your OS info since 32-bit OS cannot boot from GPT disk. More details can be gotten in the below chart.
After you make all the preparations above, the last but not least task is to find a professional third-party OS migration tool since Windows itself does not offer such a feature. Among all tests, we found the disk partition manager-AOMEI Partition Assistant Professional is really worth trying.
This software develops the “Migrate OS to SSD Wizard”, allowing users to migrate all editions of Windows 11, 10, 8.1, 8, 7, XP and Vista (32-bit and 64-bit) partition, along with other related drives, from one disk to another one (HDD to HDD/SSD or SSD to HDD/SSD). Besides, you can boot from the destination disk afterwards. What’s more, it enables you to align SSD partition to further improve SSD reading and writing performance. Now, follow the steps to finish the OS migration to SSD.
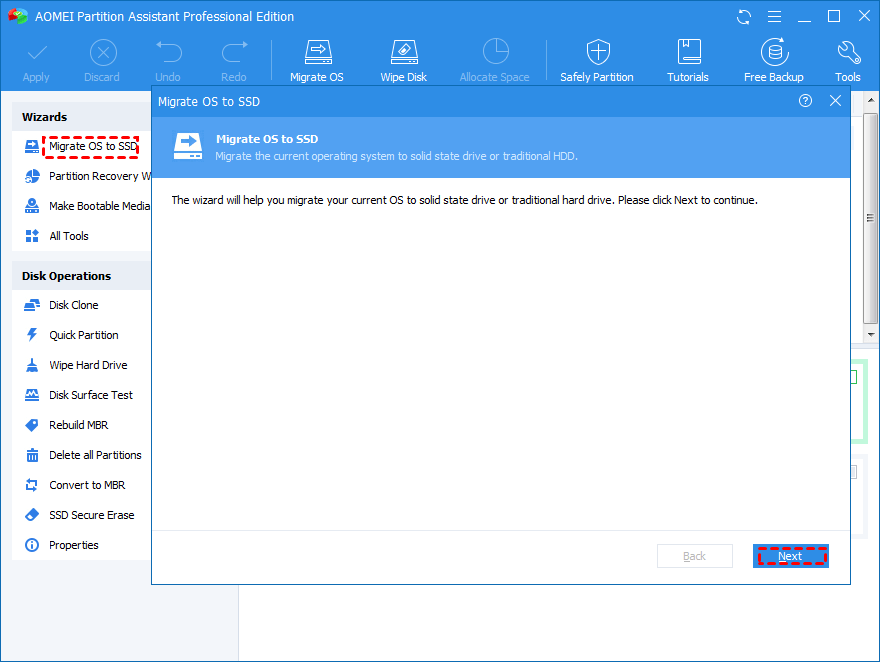
Step 1. Launch AOMEI Partition Assistant Professional. Click “Migrate OS to SSD” in the left Wizard panel and click “Next” to continue.
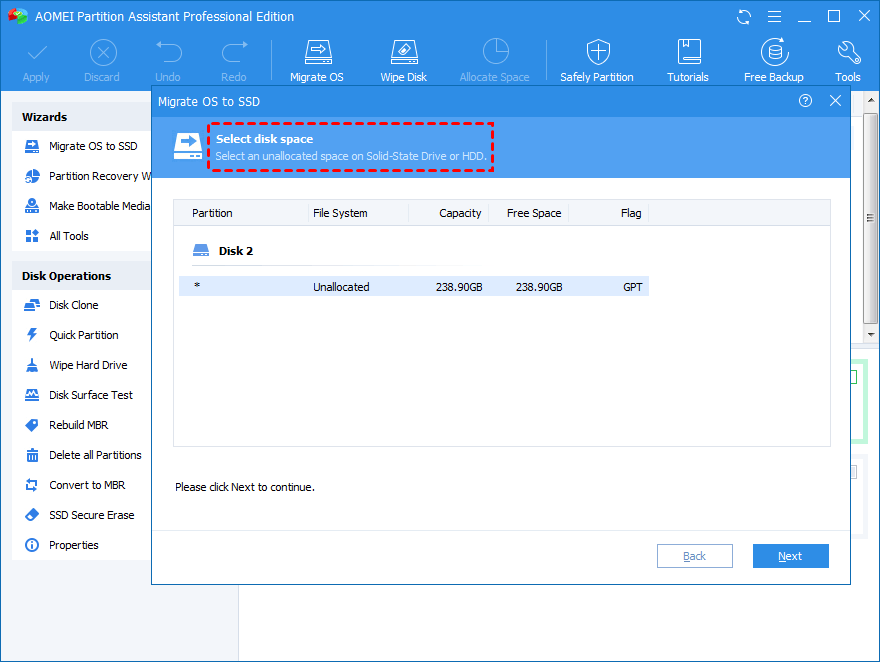
Step 2. Choose unallocated space on the SSD as the destination space. Click “Next”.
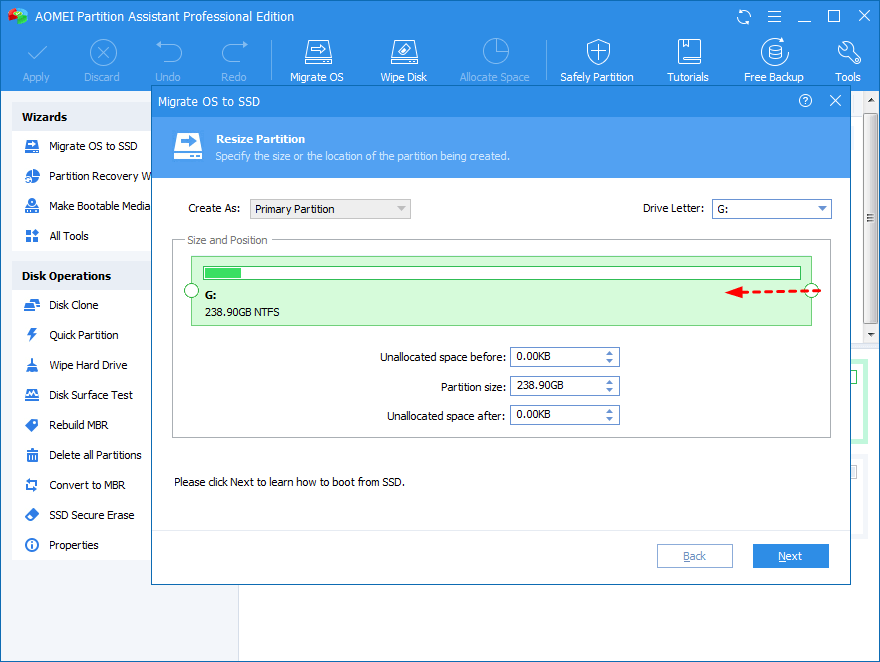
Step 3. You can resize the new system partition on the SSD drive.
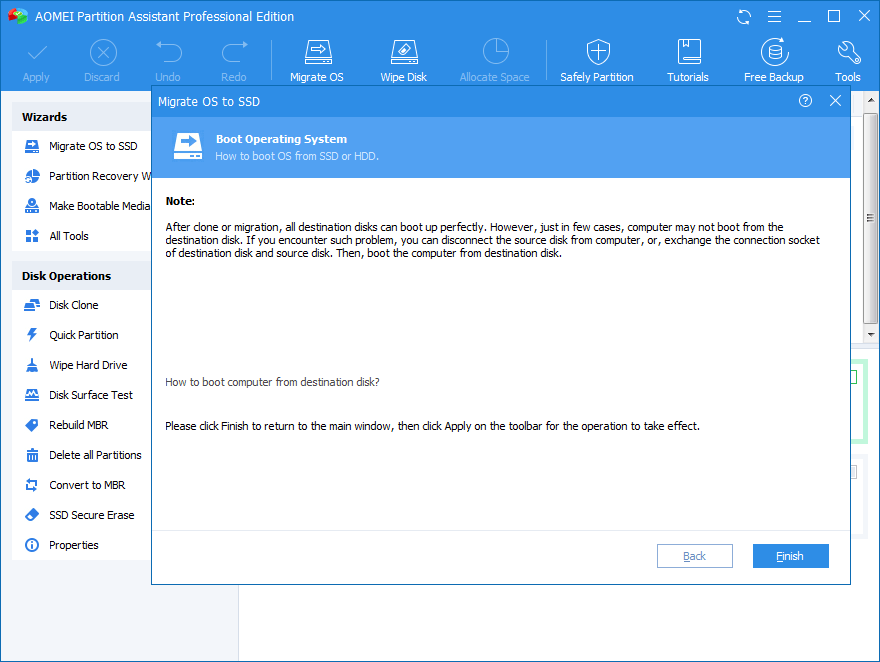
Step 4. There is a “Note” on how to boot OS from destination disk. Read it and click on “Finish”.
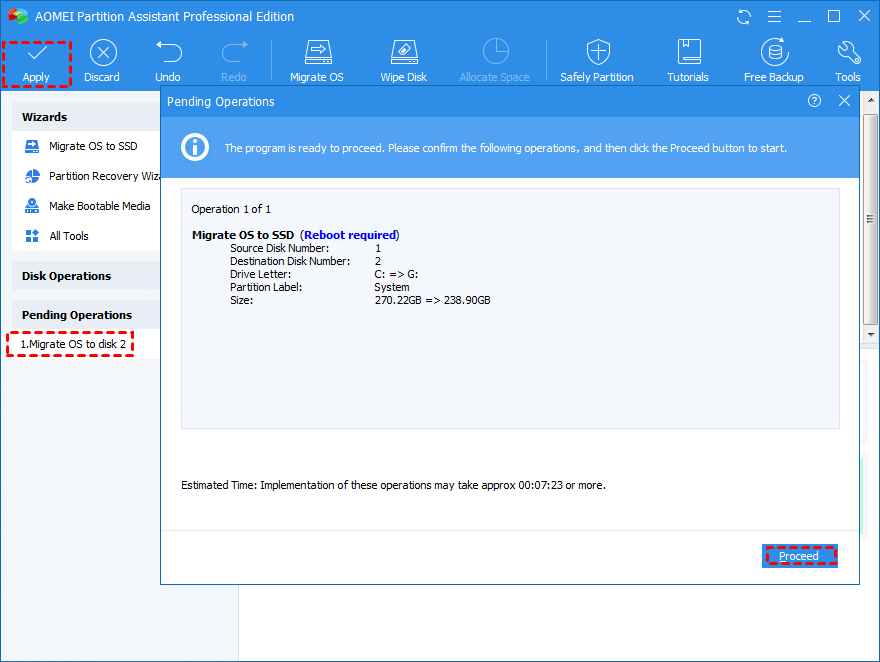
Step 5. Click “Apply” and “Proceed” to start the migration.
When you migrate Windows 10 to SSD successfully, you can remove the HDD and install the SSD to check whether the OS can start up. If not, check the boot mode and boot order then. If the OS can run well on the SSD drive, you can format the source OS partition on the source disk. Sincerely hope you can get necessary help on this page.


