

We come across a lot of screens that we wish to revisit over and over again. There are gameplay records, webinars, screencasts, conference calls that we wish to record for future references. We wish we knew how to record on Mac to capture those screens! In this era of online education and work from home environment, we often come across situations to screen record our task. Here are a few tips and tricks on how to record screens on Mac with the inbuilt utilities or with the Best Screen Recorder for Mac.
How to Record on Mac Using QuickTime Player
QuickTime Player is one of the oldest music playback utilities tagged along with macOS. QuickTime has evolved a lot in the past few years and came up with an inbuilt recording utility. It allows you to screen record on Mac and save the recording for future references.
Step 1. Go to the Launchpad on the Dock and open QuickTime Player. You can also go to the Applications Folder and open QuickTime Player.
Step 2. On the Apple menu bar, click on the File menu to explore options.
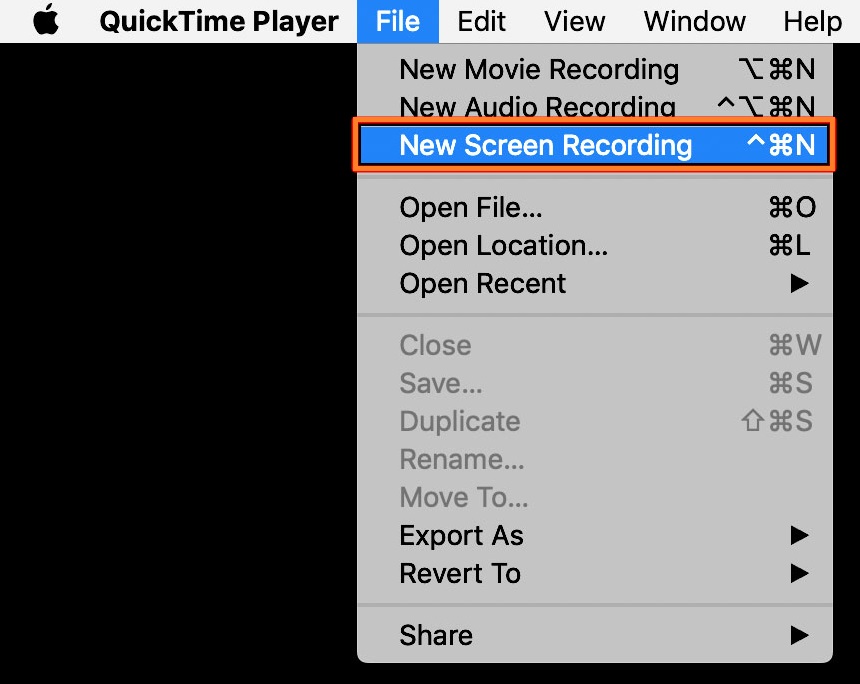
Step 3. Click on the New Screen Recording option in the File menu.
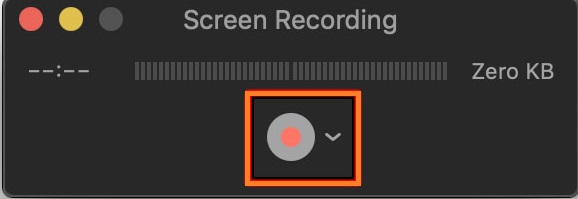
Step 4. A small window will open with a Red dot in the center. If you wish to record the entire screen, you can click anywhere on the screen or drag to select the area that you wish to record.
Step 5. Click on the Red Button to start recording. If you wish to add your voice, you can click on the drop-down menu next to the Red Button and select an internal Microphone or your connected device to record your voice. You can also enable recording your mouse clicks and pointers.
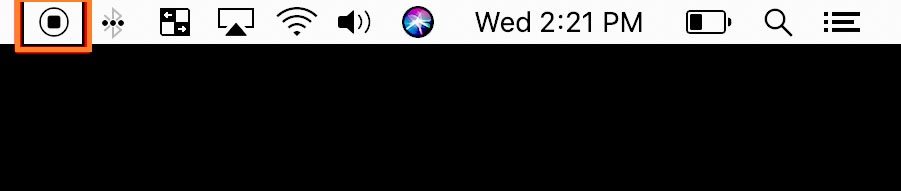
Step 6. Click on the Stop Button in the top menu bar to stop recording. QuickTime Player will open the recording on the screen. It allows you to Play, Edit, or Share the recording. Press (Command + S) or click on the File menu and select Save to save the recording.
Screen Record with Mac Screenshot Utility
MacOS has another useful utility that can help you record your screen activity. Screenshot utility can help you capture screenshots or record your screen on Mac.
Step 1. Press (Command + Shift + 5) to start the screenshot utility.
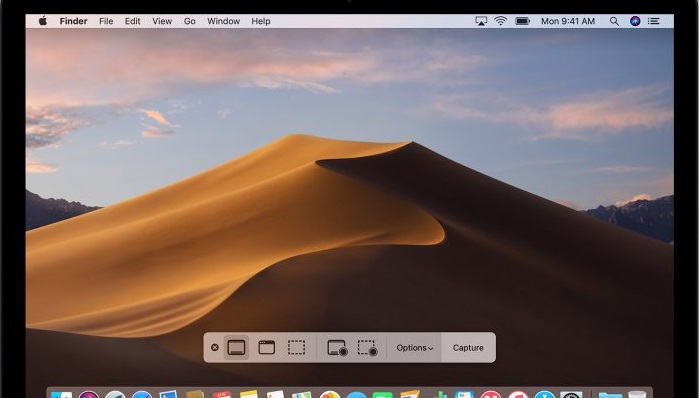
Step 2. A tiny screen recording toolbar will appear at the bottom of the screen. You can switch between options to record the entire screen, record selected portions, or record the active window.
Step 3. Once you select the ‘Record Entire Screen’ option, a small camera will appear. Click on the Record button to initiate the recording. To select a region, you need to click on the ‘Record Selected Portion’ button and then drag the corners to select the recording area.
Step 4. For more options, click on the Options button on the toolbar and you can select the destination folder, select the microphone, set timers, record mouse clicks, show floating thumbnails, and do a lot more. These options will help you add a little personalization to your videos.
Step 5. Click on the Stop button on the top-right of the menu bar. You can also press the (Command + Control + Esc) keys to stop recording. You can also bring back the screenshot utility by pressing (Command + Shift + 5) and then clicking on the Stop button.
Use Best Screen Recorder for Mac
If you are a professional video editor or deal with a lot of videos, you may need the Best Screen Recorder for Mac. We have compared, tested, and reviewed the best screen recorders for Mac and listed the one that is one of the best screen recorders for Mac in 2022.
OBS Studio
OBS Studio is the first choice of video professionals. It is a FREE utility to record, edit or publish videos from macOS or Windows platforms. It allows you to record and broadcast videos on YouTube, Facebook, Twitter or Instagram. You can easily integrate AMD video Coding Engine and AAC codec to customize input and output audio or video formats.
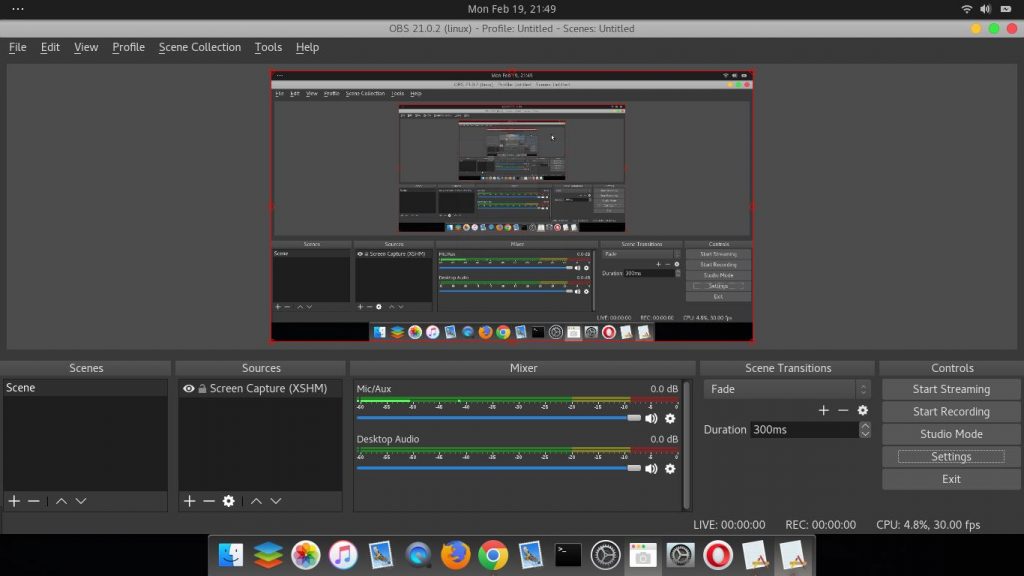
OBS Studio allows you to save the customized recorded video in multiple file formats. It may look a bit technical however a small tutorial video on YouTube will ease up your hiccups. It offers better connectivity with multiple streaming services with better configuration abilities. You can convert and mix the recorded files and preview them with multiple editing effects. It offers support in over 56 languages to cater to global customers. You can explore the Best Screen Recorder for Mac before going for a paid version.
Summing Up
This article on how to record screens on Mac has the best manual methods to record short clips on Mac without any tools. If you want to record professional videos, you can make use of the best screen recorder for Mac. There are freemium versions and paid versions available for advanced recording and editing effects. Record it up with the best screen recorder for Mac.


