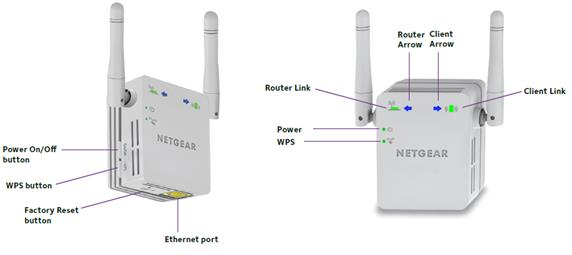
Netgear extenders are one of the most amazing WiFi devices that are on the zenith of this digital era. Due to its amazing features, millions prefer installing a Netgear extender in their homes. If you are also an owner of a Netgear extender, then you should know about the Access Control feature. It facilitates you to block specific devices from connecting to your extender’s Netgear_ext. Now, you may be wondering how it is possible. So, without any delay, let’s make you aware of what the Access Control feature is and how to enable it on your Netgear range extender.
What is Access Control?
Everyone wants to secure a WiFi network from intruders. Surely changing the password is an effective idea but hackers can still access your WiFi network. By enabling the Access Control feature on your Netgear extender, you can deny access to certain WiFi-enabled devices from connecting to your WiFi network.
The Access Control feature blocks the device through its MAC address. In order to use this feature, you need to know the MAC address of the device to which you want to deny access.
So, now you are aware of the Access Control feature and its function. Let’s talk about the steps to enable it on your Netgear range extender.
Steps to Enable Access Control on Netgear Extender
Follow the steps given below to enable the Access Control feature on your WiFi device by accessing the Netgear range extender setup wizard:
- Switch On Your Netgear Extender
Let’s commence the process of enabling the Access Control feature on your Netgear extender by powering it up. So, plug your WiFi device into an electrical outlet. Press the Power button and let the power LED on your Netgear range extender glow green.
- Connect Your WiFi Devices
After the power LED stabilizes, the next step in line is to make a connection between your Netgear extender and the existing router. To connect your WiFi devices, you have two options: a wireless source or a wire. Nevertheless, whichever connection you choose, it should be steady.
Quick Tip: For better communication between your WiFi devices, it is advised to use an Ethernet cable.
- Access the Netgear Extender Login Page
Once your WiFi devices are connected properly, it is time to access the Netgear extender login page. So, switch on your PC and launch any web browser like Google Chrome, Mozilla Firefox, Microsoft Edge, or Apple Safari. Update the web browser if it running on an outdated version and clear its cache, cookies, and browsing history.
Move the cursor to the address bar of the web browser and type mywifiext.net into it. Press the Enter key. The extender login page will appear.
- Log in to Your Netgear Extender
On the Netgear extender login page, you will be prompted to enter the default login details. So, type the default username and password of your WiFi device into their respective fields.
Remember that the default login details are case-sensitive. A small typo can prevent you from enabling the Access Control on your extender. So, be careful while entering them. Once done with entering the required details, click the Log In button.
- Enable Access Control
Hitting Log In will redirect you to the Netgear WiFi extender setup wizard. Go to the Settings menu and click the Connected Devices option. Thereafter, find the WiFi Devices table.
Once there, select the Enable Access Control and select the device you want to block from your Netgear extender’s network. If the device is not available on the WiFi device table, you can also add its MAC address manually. Finish the process by clicking the Apply button.
Now, the Access Control feature is enabled on your Netgear extender, and only allowed devices will be able to connect to your WiFi network.
Wrapping Up
Here, we wrap up our guide to enable the Access Control feature on the Netgear extender. Hopefully, you’ll get success in enabling Access Control with the help of the aforementioned steps and blocking unwanted devices from your extender’s network.


