

Do you want to transfer high-quality images you captured with your iPhone to your Mac system? Have you ever wondered how you can sync your iOS mobile with your Mac? No worries, this post can guide you through the methods suitable for connecting your iPhone device with your Mac. Synchronizing your Apple mobile with your Mac device can benefit you in many ways.
You can back up all your mobile files to your Mac hard disk to store them safely. You can use system utilities as well as a dedicated tool for connecting your iPhone and Mac devices seamlessly. There are different ways to connect and transfer files between iPhone and Mac. Let’s explore the best and quick ways to Transfer Photos from iPhone to Mac.
Manual Method to Transfer Files Between iPhone and Mac
To establish a connection between your iPhone and Mac, you can use the inbuilt utilities of your Mac. These manual methods can effectively back up your iPhone files on your Mac.
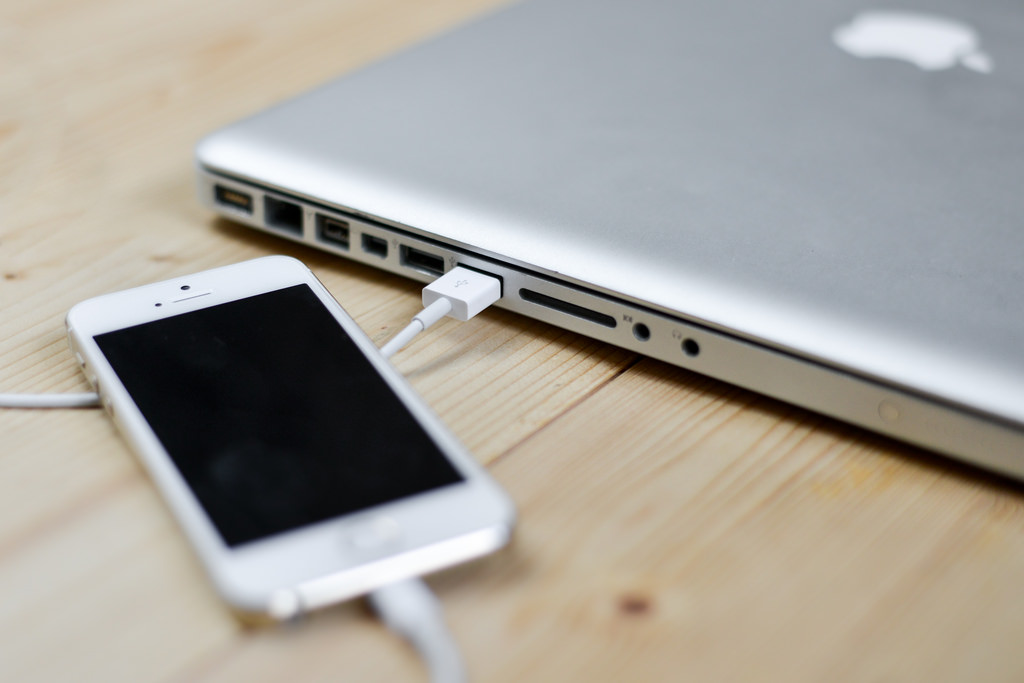
Using USB Cord
This is a simple and most obvious tweak for transferring your files from iPhone to Mac and vice versa. You can follow these steps to shift files between devices using a USB cable connection.
Step 1: Connect one end of your USB cable to your iPhone and the other to your Mac.
Step 2: Invoke a new finder Window by clicking on the bottom left corner of your Mac desktop.
Step 3: Navigate through the list of devices available to connect and choose your iPhone device.
Step 4: Now you can copy and paste files between the devices simply by following the steps for file transfer within a system.
Step 5: Just choose the content from the folder and access the destination folder to paste it.
Using Airdrop
Being the best wireless communication utility for iOS and macOS devices, Airdrop can assist you in connecting your Apple smartphones with your MacOS. The sequential steps essential for Airdrop file transfer are as given below.

From Mac to iPhone
Step 1: Acquire and establish the Airdroid application on your Mac device.
Step 2: Access the Airdroid app from the desktop icon.
Step 3: Decide the file to be transferred from your iPhone to your Mac.
Step 4: Just drag and drop the file to be transferred into the App interface.
From iPhone to Mac
Step 1: Locate and click on the file to be transferred.
Step 2: Click on the share button available at the top right corner.
Step 3: Go through the list of programs available for sharing and choose Airdroid Personal.
Step 4: App will be opened now. Choose your Mac device to copy files.
Note: For using Airdrop to transfer files from your iPhone to a Mac device, you need to turn on Wi-Fi and Bluetooth connectivity. It should be installed and accessible on both devices.
Using iTunes
iTunes can assist you in transferring your audio files to your iPad or iPhone. The following tweaks can help you in this regard.
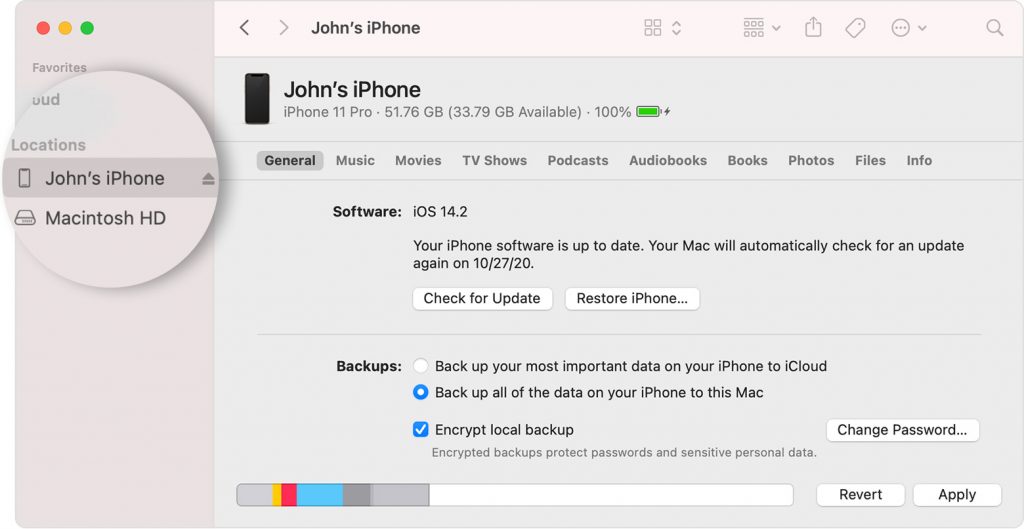
Step 1: Connect your iPhone and Mac device using a USB cable.
Step 2: Access the iTunes app from your Mac device.
Step 3: Locate and select your device icon available at the iTunes interface.
Step 4: Choose the file sharing option in the left side panel.
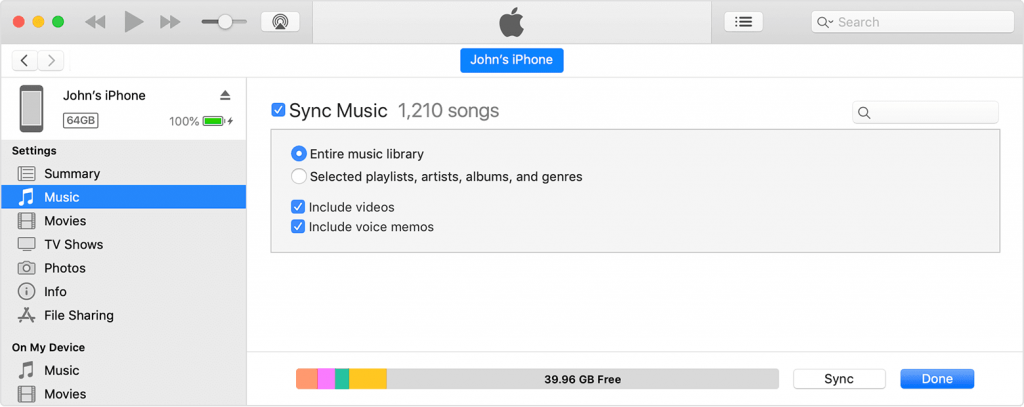
Step 5: Select the app from which you want to share files to view the files you can transfer.
Step 6: Select the add icon to initiate the file transfer.
Using iCloud
Cloud storage is the online memory that you can access from anywhere. You can upload your files to it for viewing on your Mac as well as iPhone.
Step 1: Enable the synchronizing options for iCloud storage on your iPhone device.
Step 2: Access the iCloud storage from your Mac device. You can do it from System Preferences in the Apple menu.
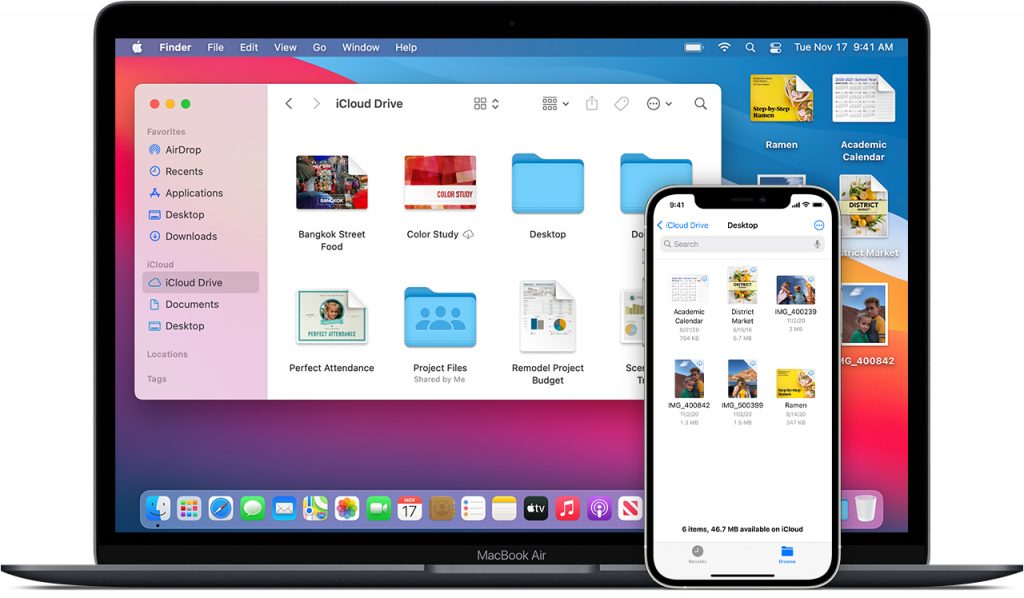
Step 3: As the file synchronization is turned on, you can view the same files on your iPhone and Mac devices.
Step 4: Select the file you want to acquire and download it to make it available offline.
Using AnyTrans
If you are not comfortable with the manual steps of the method described above, you can try using a dedicated app for transferring photos between iPhone and Mac.
Step 1: Access the trusted source to download and install the AnyTrans application.
Step 2: Use the USB cable to connect your iPhone and Mac device.
Step 3: Access the app and choose the photos located at the top right corner of the software.
Step 4: Select the photos you want to transfer and choose the “To Mac” option.
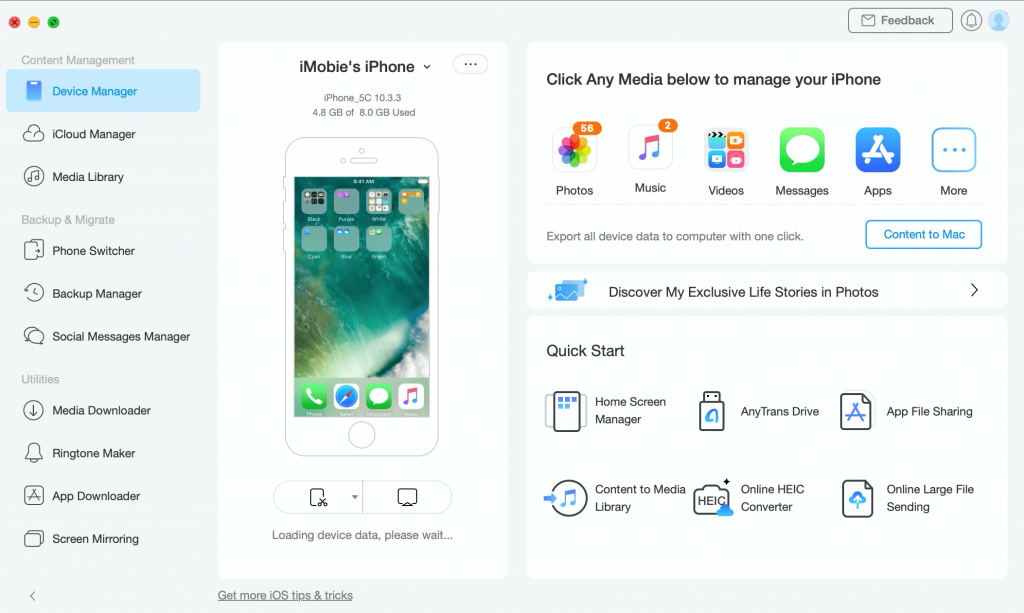
Step 5: Wait for the transfer to complete and choose the view files in the export photos tab to check the transferred files.
Summing Up
Transferring photos from iPhone to Mac device is an essential tweak for everyone. You can try these quick tips to transfer files between iPhone and Mac with ease. These methods are safe and secure for your file transfers. This post describes all the best possible ways to transfer files between iPhone and Mac PC.


